AWI Game 2: The fight at Livingstone House
- Apr 22, 2020
- 5 min read
Updated: Jan 4, 2022


Major Joseph Hawley is in trouble. Wounded and routed by the British at Wilsons Creek (See AWI Campaign Game 1) he has led his forces back through the Livingstone estate. Tended by a local physician he is holed up in the main house as attempts to gather himself and his men as the redcoats under Major Montague Roysten pursue. Worst still, one of his sub officers, Captain Peele was killed in action defending Wilson's Creek.
Temporarily incapacitated from command as he has his own wounds tended he has only one ranking officer still in the field, Captain Morgan Bailey. LT Henry Charter is quickly promoted to add some stewardship to the American defence. Its a tough ask - one junior officer and an inferior officer trying to organise their defences against a superior led and equipped force. If they can delay the British long enough - it might give Major Hawley enough time to recover (I decided that if the Americans could get two full Chain of Command Dice then it would denote that Hawley had been patched up sufficiently to assume command.
Captain Bailey and Lt Charter had at their disposal a regiment of regulars that had lost some men in the action at Wilson's Creek, a unit of Militia that had suffered some casualties in the previous engagement along with 2 fairly fresh regiments of Militia. He also managed to use his space supply points to call upon a newly raised militia regiment.

Opposing them and advancing from their victory at Wilson's Creek was Major Royston. Royston had been bolstered by a regiment of Scots (which he had spent his extra supply points on) to which he already had 2 units of light troops, a regiment of regular British foot and a regiment of Loyalist Canadian's.
He also had two supporting officers who had performed well in the previous engagement - Captain Henry Cole and Captain George Brant (who suffered a light wound during hand to hand fighting with American regulars). Brant's wound would mean he had reduced vision and hence a limited command range in the second game.
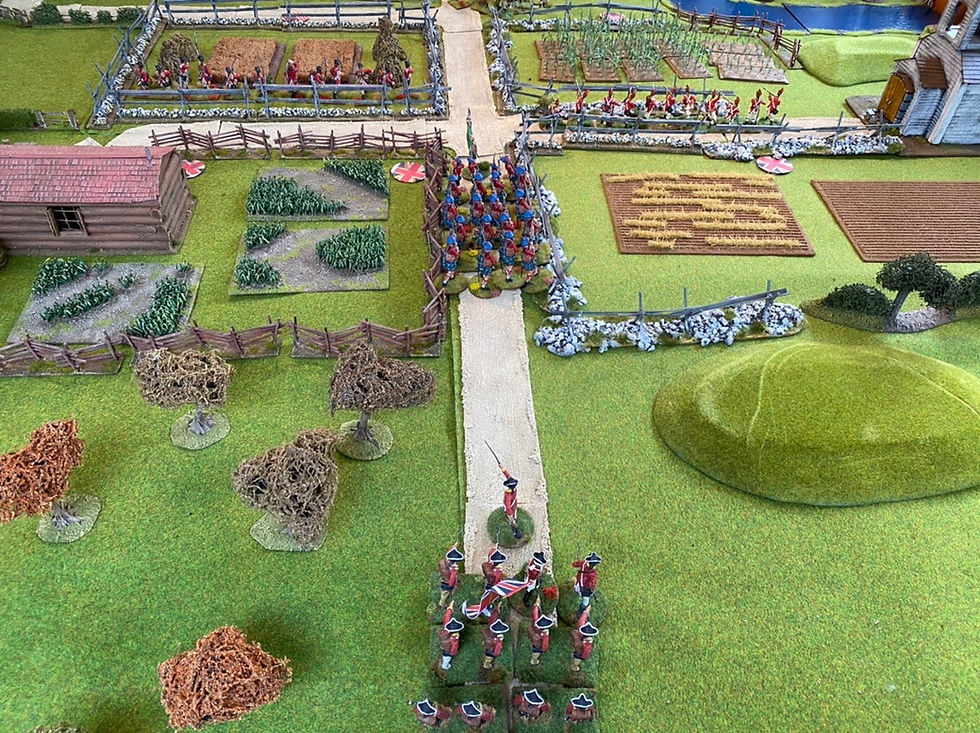
The start of the game looked like this (see below). The British light units and scouts had managed to penetrate into the grounds of the estate and establish Jump off Points on the road that bordered some of the crop fields. The Americans deployed their Jump Off Points around Livingstone House. The Scene was set. Dr Arnold Ghent was under a good deal of pressure to get Major Hawley patched up so he retake command.
The British started on a solid 9 Force Morale and the Americans at 8.

Major Royston as the attacker got proceedings under way. He immediately despatched the Scots down the main track towards Livingstone House and deployed a unit of British Lights in the fields on his left flank. In response Captain Bailey deploys two unit's of Militia either side of the main house.


Phases 2 and 3 see the British deploy more light troops on their right flank near the chapel. The Scots make good progress and Captain Cole leads another unit of Regulars to support the Scottish.
On the British left flank the Loyalist Canadians make into the copse (you can see that the British have advanced into he fields).
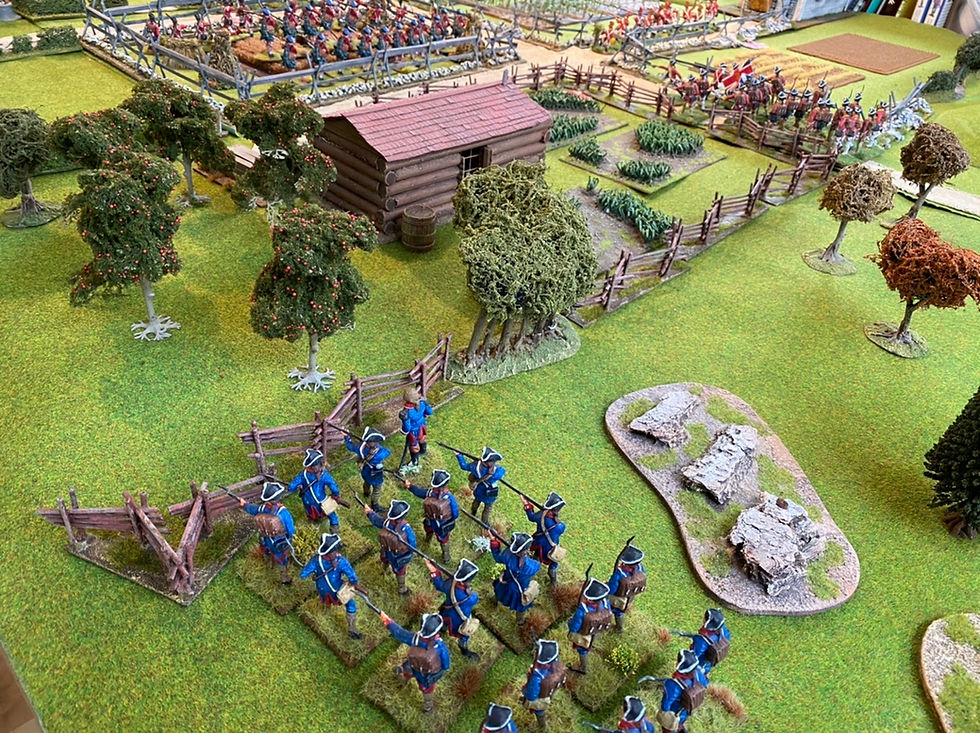
The Americans start to deploy in defence of the main house - with the British lights pushing up to engage with them.


American regulars led by Captain Bailey have moved up to support the Militia and exchanges of fire can be seen between the Americans and the Scots.The British lights have moved further to the British left flank. The Scottish fire proved pretty effective over several phases for the militia who were no match at such close range and were soon whittled down. Luckily Captain Bailey led his regulars to form a defensive line in support of the embattled militia.

With the Continental Militia finally being driven back under fire - the Scots engage the regulars. An American Jump Off Point lies tantalisingly close to them - much to the worry of the Americans. In the background Captain Cole leads the British regulars up the track into the front line.
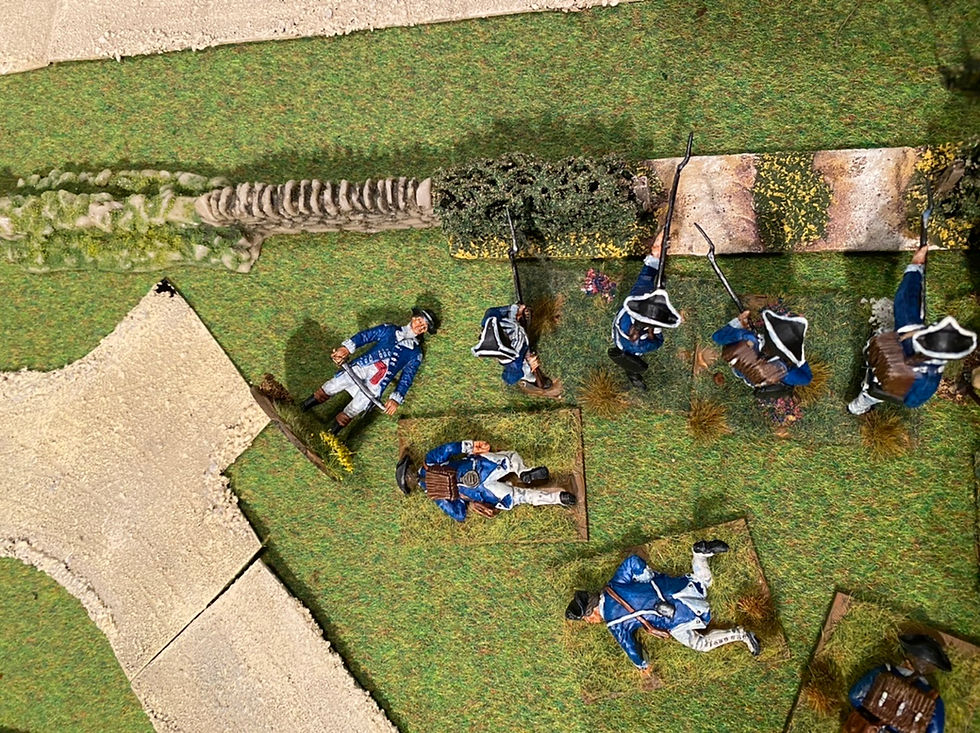
Captain Cole leads a charge into the American Militia holding the left flank.

Somewhat fortunately Lt Charter rallies his men and just about manages to repulse the British attack. In doing so Captain Cole is also injured for the British - resulting in a loss of a Force Morale Point for the redcoats. The British fall back and regroup.
Then the British add insult to injury by getting a double phase and a turn end! Which results in a broken militia unit fleeing from the field. The Americans suffer a further point reduction to their Force Morale - which is down to 4!
While the British fall back - the Scots urged on by Captain Brant advance forward and take control of an American Jump Off point. Worst still, Captain Bailey is felled by a Scottish Bullet and dies immediately!
A double Force Morale check is needed - resulting in the loss of 2 Force Morale points to the Americans. They are down to a Force Morale of 2!
The only positive for them is that a fresh unit of Militia rock up alongside their regular compatriots.
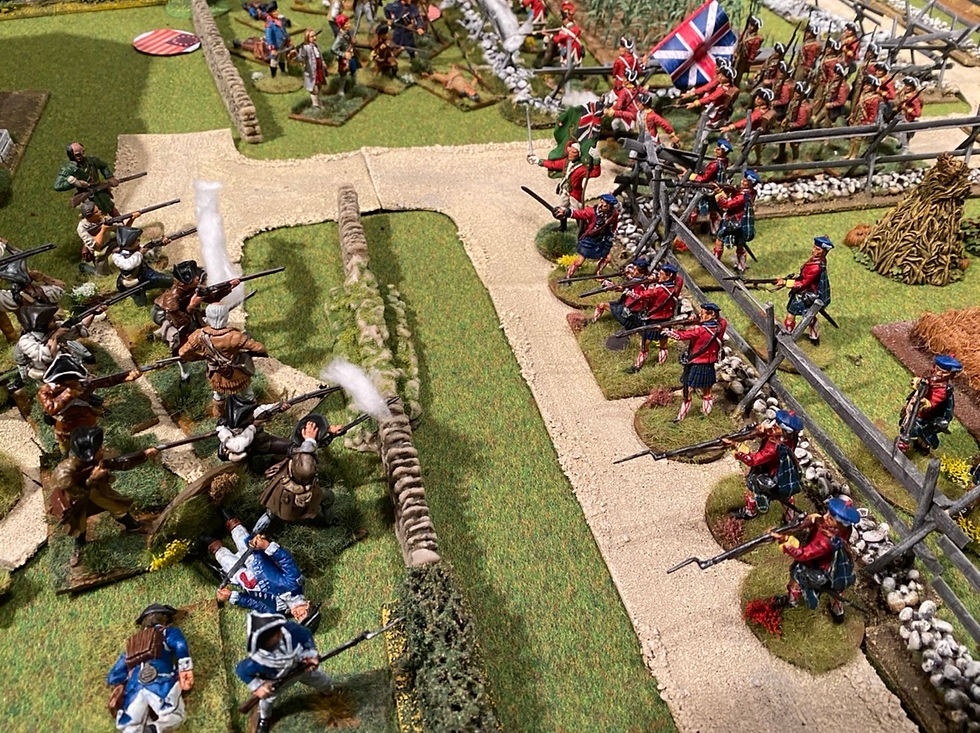
On the American left, the remains of the stubborn militia led by Lt Charter become caught in a deadly crossfire between the British Lights and Regulars. This is too much for them to stomach and they break. To make matters worse the British lights manage to advance onto a second Jump off Point. The American Force morale is now down to 1! and they are barely hanging on.


The Americans are 1 off a double Chain of Command Dice which will enable them to field Major Hawley and achieve one of their objectives! But with their Force Morale at 1 and their command dice down to 3 - it is not looking good!
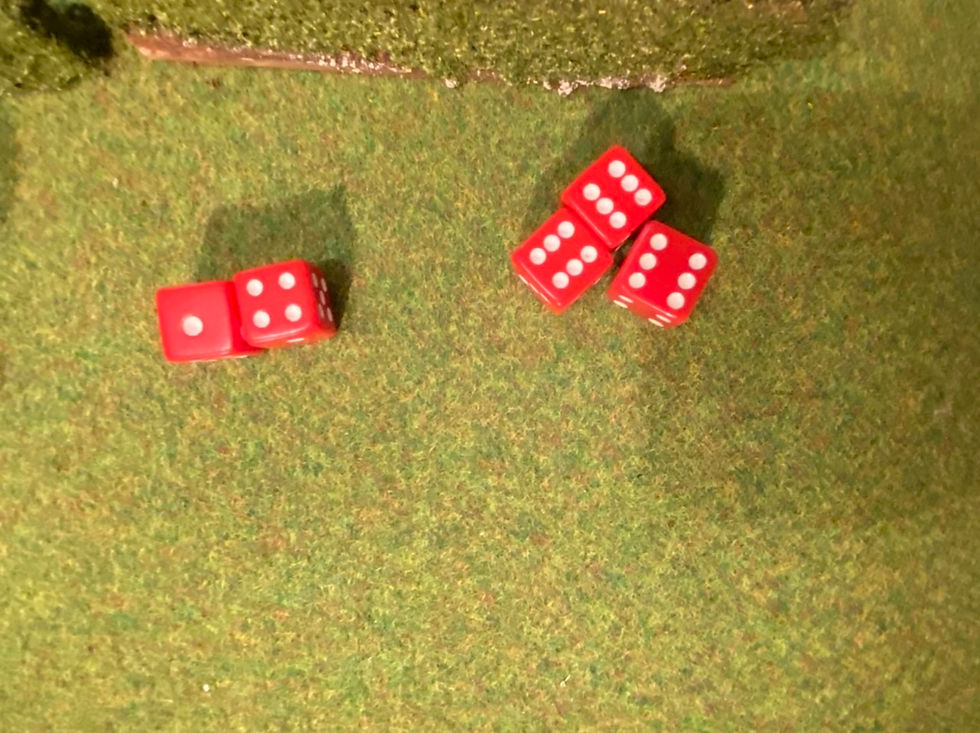
The American Phase. They manage to throw a 5, 4 and and 2 on their Command Dice. A miracle!
Major Hawley is seen emerging bandaged from Livingstone House and immediately tries to rally the remnants of his troops. Trying to turn a rout into an ordered retreat.

He managed to restore some order to the regulars who are still holding the line despite the demise of Captain Bailey.
The Canadian Loyalists charge home against the regulars! Luckly for them the slight cover makes the difference and they hold the line!

In the next American Phase Major Hawley is able to activate again and orders a general retreat.
A second victory for Major Royston and the British - but some success for the Americans. Despite having poor command ability they manage to hang on to ensure Major Hawley is treated successfully to return to command.It also bought vital time for the Continentals to muster some reinforcements to throw into the line.
Major Royston elects not to pursue for risk of stretching his supply lines dangerously. The British loose 20 casualties to the Americans 41. The British will recover 12 next battle and 2 in the one after that. The Americans have lost 20 permanently - but will see 11 return next battle and 10 the one after that. The British High command's opinion of Major Royston increases to 4 and the men's opinion of him have risen to 3. He will gain some welcomed additional support for the next fight.
For Major Hawley he was relieved to get away. His American superiors have a -2 opinion of him and his men -3 - worrying for him but not fatal quite yet. He is also able to lick his wounds in the coming days as the British decided to consolidate their positions. He is more than grateful for the opportunity to marshal his troops. One positive was the effectiveness of Lt Charter. He is promoted to Captain and changes from an inferior supporting officer into an effective one.


Comments